In this step-by-step guide, you’ll discover how to transform your ordinary electric kettle into a personalized statement piece that not only serves its functional purpose but also complements your kitchen’s decor. With empathy for your creative spirit, we will explore various ways to enhance the kettle’s appearance, from choosing vibrant colors and patterns to adding unique decals and accessories. Whether you’re looking to express your personal style or simply add a touch of flair to your kitchen, this guide offers thoughtful insights and practical tips to help you create a stylish electric kettle that you’ll be proud to showcase.


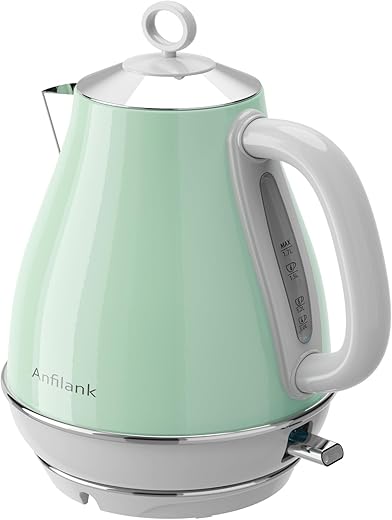
1. Choose Your Base Kettle
- Evaluate the size of the kettle based on your daily beverage needs. Think about how often you entertain guests versus your solo brews.
- Choose a material that aligns with your aesthetic preference and practicality. Options like stainless steel offer durability, while glass provides a sleek view of the boiling process.
- Assess functionality by considering features like temperature control and auto shut-off for added safety. These extras can enhance your brewing experience.
- Research various brands and read customer reviews to ensure reliability and performance before making your purchase.
2. Gather Customization Materials
- Research heat-resistant paints, decals, or stickers suitable for kitchenware. Ensure they are specifically designed to withstand high temperatures.
- Visit your local craft store or browse online for customization materials. Check product descriptions to confirm they are safe for kitchen use.
- Purchase additional supplies, such as brushes or sponge applicators, ensuring they are of good quality.
- Gather safety equipment, like gloves and masks, to protect yourself while working with these materials.
- Organize your workspace, making sure it is clean and free from any contaminants that could interfere with your customization project.
3. Prepare the Kettle’s Surface
- Clean the kettle thoroughly using warm soapy water and a soft cloth to remove any dust or grease. Ensure all areas, including the handle and spout, are addressed. This step is crucial for achieving a smooth surface that allows any paint or decals to adhere properly.
- Rinse the kettle well with clean water and dry it completely with a lint-free cloth. Any leftover moisture can interfere with adhesion when applying new materials.
- Lightly sand the surface of the kettle with fine-grit sandpaper, focusing on areas where you plan to paint or apply decals. This process creates a slightly rough texture, enhancing the bond between the kettle’s surface and the new materials.
- Wipe away any dust created by sanding with a damp cloth, ensuring the kettle is clean and ready for the next step in your project.
4. Design Your Custom Look
Sketch out your design by using a pencil and paper or a digital drawing tool. Visualize the overall look you want to achieve by considering different shapes and layouts. Choose your colors carefully, keeping in mind how they will blend together and complement your style; experiment with different color combinations. Decide on patterns for any decals or paint, and think about their placements; ensure they align with your vision to create a cohesive and stylish appearance.
5. Apply Base Color (if painting)
Apply a base coat of your chosen color onto the kettle. Choose high-temperature resistant paint to ensure safety and durability. Use a brush or spray to cover the kettle evenly, avoiding drips or streaks. Allow the paint to dry completely according to the manufacturer’s instructions before proceeding to the next step.
6. Add Designs and Accents
Apply your designs or decals once the base coat is dry. Use a clean brush or a pair of tweezers for precise placement. Experiment with various patterns, shapes, and quotes that reflect your personal style. Press down firmly on each design to ensure a secure bond and prevent peeling. Allow the designs to set for a few moments before moving on to any additional layers or finishes.
7. Seal the Customization
- Choose a clear, heat-resistant topcoat suitable for your kettle material. Look for options specifically designed for high-heat applications to ensure durability.
- Ensure the surface is clean and dry before application. Wipe down your kettle with a soft cloth to remove dust, oil, or fingerprints.
- Apply the topcoat evenly using a foam brush or spray can. Start from one side and move across, making sure to cover all custom designs without over-saturating.
- Allow the first coat to dry fully before adding a second layer for extra protection. Check the drying time on the product’s label for best results.
- Once the final coat has dried completely, inspect for any missed spots. Touch up if necessary to ensure all areas are sealed.
8. Final Assembly and Touch-Ups
Reassemble any parts that were removed during the customization process, ensuring that each piece fits securely and aligns properly. Inspect all surfaces for any imperfections or areas that may need touch-ups, such as scratches or uneven paint. Apply touch-up paint or sealant where necessary, using a fine brush for precision. Allow the touch-up materials to dry completely before moving on to the next step in your project.
9. Test Your Customized Kettle
Boil water in your customized kettle before using it for the first time. Fill the kettle with fresh water, ensuring that it reaches the maximum fill line. Once filled, place it on the heat source and turn it on. Watch closely for any unusual sounds or smells during the boil; this can indicate issues with the design materials. After it reaches a rolling boil, carefully pour out the water and allow the kettle to cool. This test ensures the kettle is safe and functions properly, giving you peace of mind for future use.
Elevate Your Kettle Experience
In conclusion, customizing your electric kettle is a delightful way to blend functionality with personal flair. By embracing creativity in your design choices and following the steps laid out in this guide, you can transform a standard appliance into a standout piece that reflects your unique style. Not only will your kettle become a practical tool for making your favorite beverages, but it will also enhance the aesthetic of your kitchen. So go ahead, unleash your inner designer, and enjoy the process of making your electric kettle truly your own!
Essential Equipment Needed
- Electric kettle
- Sandpaper or sanding sponge
- Paint or spray paint (heat-resistant)
- Paintbrushes or spray paint nozzle
- Painter’s tape
- Stencils or decals
- Protective gloves
- Clear sealant or varnish
- Cloth or sponge for cleaning
- Craft knife or scissors
- Design software (optional for digital designs)
- Safety goggles

Enhance Your Kettle
- Choose the Right Color: Select a kettle color that complements your kitchen decor. Consider trendy hues like matte black, sleek stainless steel, or pastel shades
- Add Personalized Stickers: Use food-safe vinyl stickers or decals to personalize your kettle. Choose designs that reflect your personality or interests
- Swap Out the Cord: If your kettle has a detachable cord, consider customizing it with a colored or patterned cord to add a fun touch
- DIY Handle Wraps: Create a cozy handle wrap using fabric, leather, or rubber to enhance grip and add a unique style
- Opt for Custom Temperatures: If possible, select a kettle that allows you to set specific temperature levels. This not only customizes your brewing experience but can also tie into your aesthetic
- Accessorize with Mugs: Pair your kettle with custom mugs that match your style—whether it’s quirky, elegant, or rustic
- Use a Decorative Base: If your kettle is cordless, consider a decorative base that can enhance its aesthetic when it’s not in use
- Incorporate Themed Accessories: Surround your kettle with themed items like a stylish spoon rest, tea canisters, or a decorative tray that reflects your style
- Make It Functional: Customize your kettle by adding useful features like an engraved date or message on the base that celebrates a special occasion
- Invest in a Stylish Tea Infuser: Enhance utility and style by adding a designer tea infuser that complements your kettle

18 comments
Jax
I’m curious about the sealing process. What kind of sealant do you recommend? I used a spray sealant before, but it didn’t hold up well. Any advanced tips?
wpx_
Great question! For sealing, I recommend using a clear acrylic spray sealant for durability. Make sure to apply several thin coats rather than one thick coat. It really helps with longevity!
Lux Storm
Can you share more on how to ensure the base color is even? I had trouble with splotches when I painted my kettle. What’s the best technique?
wpx_
Definitely! For an even base color, use light coats and a spray paint technique. Keep the can at a consistent distance and move smoothly to avoid drips. Practice makes perfect!
Alva
So, I’m interested in the final assembly. Do I need to be careful with the electrical components after customizing? Any tips on that?
wpx_
Yes, be very careful with the electrical components! Make sure everything is completely dry before reassembling, and double-check that no paint or materials got into the wiring. Safety first!
Teddy
Just finished customizing my Hamilton Beach kettle, and I added a fun floral design! I can’t believe how much it brightened up my kitchen. Anyone else tried adding designs?
wpx_
Floral designs sound lovely! I bet it adds a nice touch to your kitchen decor. Did you use stencils or freehand it?
Nox Blaze
I’m planning to use my customized kettle as a gift. Any thoughts on personalizing it with names or initials? How would you go about that?
wpx_
That’s a great idea! You could use a stencil for names or initials and paint over it. Alternatively, consider using vinyl decals for a cleaner look. Personal touches always make gifts special!
Scout
Has anyone used vinyl wraps instead of paint? I’m thinking of trying that for my kettle to avoid the hassle of painting and sealing.
wpx_
Vinyl wraps can be a great alternative! They come in many colors and designs and can be easier to apply. Just make sure to choose heat-resistant vinyl since kettles can get pretty hot!
Pip Feather
Thanks for sharing! Matte black and gold sound like a killer combo! Would love to see a picture of your kettle. Any tips on the painting process you found helpful?
Wren Clover
Hey, this guide is awesome! I just customized my Breville BKE820XL and it looks so cool now. I went with a matte black finish and added some gold accents. Anyone else have success stories? Would love to hear your designs!
Nia Belle
For those of you who have painted your kettles, how well does the paint hold up against heat? I’m worried it’ll just peel off over time.
wpx_
That’s a valid concern! Using high-temperature paint can help with that. Look for paint specifically made for metal and heat resistance to ensure it lasts.
Drew Sky
I tried customizing my Cuisinart CPK-17 and ended up with a mess! The paint ran everywhere. I think I skipped the surface prep step. Anyone have tips for avoiding this?
wpx_
Oh no! Surface prep is super important. Make sure to clean the kettle thoroughly and consider sanding it lightly for better paint adhesion. Practice on a small area first if you’re unsure.