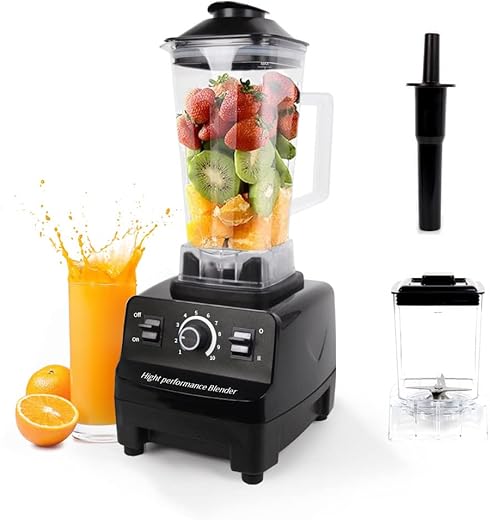
This step-by-step guide demonstrates how to make nut butter using a high-performance blender, highlighting the appliance’s capability to create smooth blends from various nuts. It outlines the necessary ingredients, equipment, and techniques to achieve a creamy and delicious nut butter. From selecting the right nuts to blending them to the desired consistency, this guide ensures a straightforward and efficient process for both beginners and experienced cooks. Whether you prefer almond, peanut, or cashew butter, this guide equips you with the knowledge to enjoy homemade nut spreads effortlessly.


1. Gather Your Ingredients
Select your preferred nuts for making nut butter. Consider common options like almonds, peanuts, cashews, or hazelnuts, each offering its unique flavor and texture. Measure out about 2-3 cups of raw nuts, ensuring they are unsalted and unroasted for the best results. If you’re feeling adventurous, mix different types of nuts together to create a custom blend that suits your taste!
2. Prepare the Nuts
Roast raw nuts to enhance their flavor and bring out a delightful nuttiness. Spread the nuts in a single layer on a baking sheet, ensuring they have enough space to roast evenly. Place the baking sheet in the oven set to 350°F (175°C). Roast for about 10-15 minutes, stirring the nuts every 5 minutes to prevent them from burning and ensure even cooking. Keep a close eye on them, as they can turn from perfectly toasted to burnt quickly!
3. Add Nuts to the Blender
Add the cooled nuts to the blender. Ensure not to overfill the container; it’s best to fill it no more than halfway for optimal blending. Secure the lid tightly before starting the blender to avoid any spills. Blend on a medium setting, checking periodically to achieve your desired consistency.
4. Start Blending
Start your blender on a low setting to gently break down the nuts. This initial speed helps prevent any flying debris and allows you to control the blending process.
- Gradually increase the speed to medium or high once the nuts have started to crumble.
- Keep an eye on the texture; you want it to become smooth and creamy.
Examples include almond butter or cashew cream. This blending process may take anywhere from 3 to 10 minutes, so be patient and monitor the consistency. Stop occasionally to scrape down the sides of the blender for an even blend.
5. Scrape Down the Sides
Pause the blender every minute or so. Use a spatula to carefully scrape down the sides, gathering any nuts or ingredients that may have clung to the walls. Blend again to ensure an even consistency. Repeat this process until your mixture is smooth and well combined.
6. Add Optional Ingredients
- Add optional ingredients like salt to enhance the flavor profile of your dish. A pinch of sea salt can elevate sweetness and balance the overall taste.
- Sweeteners like honey or maple syrup can also be included for a touch of sweetness. Start with a teaspoon, and adjust according to your preference.
- Incorporate a splash of oil, such as olive or coconut oil, for a smoother consistency. This will help blend everything together beautifully.
- Blend again until fully combined, ensuring all ingredients are well integrated and the mixture is silky smooth.
7. Check the Consistency
Pause the blender and take a moment to assess the consistency of your nut butter. Scoop a small amount with a spoon; if it feels too thick or grainy, add a teaspoon of oil or a splash of water. Blend again until the mixture reaches the desired creamy texture. Repeat this process in small increments, blending and checking, until you’re satisfied with the smoothness.
8. Transfer to a Container
Transfer the smooth and creamy nut butter into a clean jar or container. Use a spatula to scrape the sides of the blender, ensuring all of the nut butter is collected. Press the spatula against the bottom and sides to get every last bit. Seal the jar tightly to keep your nut butter fresh and ready for use!
9. Store the Nut Butter
Seal the container tightly to prevent air from entering and causing the nut butter to spoil. Store the nut butter in the refrigerator to extend its shelf life. Consume the nut butter within the first month for the best flavor and freshness, although it can last for several weeks if kept sealed and chilled. Check the nut butter regularly for any signs of separation or changes in smell before using.
10. Enjoy Your Nut Butter
Scoop your homemade nut butter into a jar and store it in the refrigerator for freshness. Spread it generously on your favorite toast for a delicious breakfast or snack. Blend a spoonful into your morning smoothie for added creaminess and protein. Incorporate it into recipes like cookies or energy bars for a tasty twist that everyone will love!
Final Thoughts and Tips
In conclusion, making nut butter in a high-performance blender is not only easy but also a fun way to enjoy a nutritious snack. With just a few simple steps, you can whip up your own delicious blend, customized to suit your taste. I hope this guide inspires you to experiment and create nut butters that are perfect for you and your loved ones. Happy blending!
Essential Equipment Needed
- High-performance blender
- Nuts (e.g., almonds, peanuts, cashews)
- Measuring cup
- Spatula
- Optional ingredients (e.g., salt, honey, oil)
- Airtight container for storage

Maximize Your Blend
- Choose the Right Nuts: Start with raw or roasted nuts, such as almonds, cashews, or peanuts. If you want a more pronounced flavor, opt for roasted nuts
- Measure Your Nuts: Use about 2 to 4 cups of nuts for the best results. This will provide enough volume for the blades to work effectively
- Let Your Nuts Rest: If you’re using cold nuts straight from the fridge, let them sit out for a bit to reach room temperature. This helps with the blending process
- Blend in Intervals: Start blending in short bursts (about 10-20 seconds) and then stop to scrape down the sides. Repeat this process to ensure even blending
- Be Patient: Nut butter takes time. Initially, your nuts will turn into a powder, but don’t give up! Keep blending until it transforms into a creamy butter
- Add Oil Sparingly: If your nut butter seems too thick, you can add a small amount of neutral oil (like grapeseed or avocado oil) for a smoother consistency
- Season to Taste: Once you reach your desired consistency, experiment with adding a pinch of salt, sweeteners, or flavors like vanilla for extra taste
- Store Properly: Transfer your nut butter to an airtight container and store it in the fridge. It should stay fresh for several weeks
- Clean the Blender: After making your nut butter, fill the blender with warm water and a few drops of dish soap, and blend for a quick clean!
- Experiment with Flavors: Don’t be afraid to get creative! Try adding spices, dried fruits, or even coconuts to give your nut butter a unique twist
Mastering Your High-Performance Blender: Tips and Techniques for Optimal Use
- Start with the Basics: Familiarize yourself with the blender’s components and settings. Most high-performance blenders come with various speed options and programs for smoothies, soups, and more. Take a moment to read the manual and understand how to operate it properly
- Prepare Ingredients Properly: For optimal blending results, cut your ingredients into smaller, uniform pieces. This helps the blades work efficiently and ensures a smoother texture in your final product
- Layer Your Ingredients: When adding ingredients to the blender, place the liquids at the bottom, followed by softer ingredients, and then the harder items on top. This layering technique allows for better blending and prevents jams
- Start Slow and Increase Speed: If your blender has variable speed settings, begin with a low speed to get everything moving, then gradually increase the speed for a smoother blend. This approach helps to avoid splatter and ensures everything is mixed evenly
- Don’t Overfill: Make sure to leave some space at the top of the container. Most blenders have a fill line—exceeding it can lead to spills and uneven blending
- Once you get the hang of it, you’ll love the versatility and power of high-performance blenders! Happy blending!
Your Questions Answered: High-Performance Blenders
How do high-performance blenders compare in noise levels with standard blenders?
When it comes to noise levels, high-performance blenders typically operate at a louder volume compared to standard blenders. This is largely due to their powerful motors and faster blade speeds, which are designed to blend ingredients more efficiently and quickly.
To give you a clearer picture, high-performance blenders can reach noise levels around 85 to 90 decibels or more, especially when blending hard or dense ingredients. In contrast, standard blenders usually operate at around 70 to 80 decibels.
While the difference might seem small in terms of decibels, it can be quite noticeable in a kitchen setting. If noise is a significant concern for you, it might be worth considering models specifically designed to minimize sound, as some manufacturers do offer quieter variants of high-performance blenders. Overall, if blending speed and thoroughness are your top priorities, the trade-off in noise may be worth it!
How do I clean a high-performance blender properly to ensure longevity?
Cleaning a high-performance blender properly is essential for maintaining its longevity and performance. Here’s how I do it:
- Immediate Rinse: Right after use, I like to add a little warm water and a drop of dish soap to the blender jar. This helps loosen any residual food particles.
- Blend: I secure the lid and run the blender on high for about 30 seconds. This process usually cleans the blades and the sides of the jar effectively.
- Rinse Again: After blending, I rinse the jar thoroughly with warm water to remove any soap residue. I make sure to wash the lid and any removable parts as well.
- Deep Cleaning: For deep cleaning, I occasionally use a mixture of baking soda and vinegar or a mild cleaner specifically designed for blenders. I let it soak before rinsing thoroughly.
- Drying: I hand-dry the jar and parts with a soft cloth or let them air dry completely before reassembling to prevent moisture buildup.
- Avoiding the Dishwasher: I usually avoid putting the blender jar and parts in the dishwasher, as the high heat can warp or damage them over time.
- Regular Maintenance: I check and clean the seals and blades carefully to ensure there’s no buildup or damage, which can affect performance.
By following these steps, I find that my high-performance blender stays in great condition and lasts for many years!


5 comments
Rhea Lynn
I love this guide! Just a heads up, if you’re using cashews, they blend up way faster than almonds, so keep an eye on the consistency. Also, adding a pinch of salt makes a huge difference in flavor. I added a bit of honey too for a touch of sweetness, yum!
wpx_
Thanks for the tip! Cashews do blend differently, and salt is a great addition. We love seeing how folks personalize their nut butters!
June Bug
Followed this guide and made peanut butter last night. It was a total hit with my kids! They can’t get enough of it! I added a bit of cocoa powder for a chocolate twist, and it was so good! I’m feeling like a nut butter pro now, haha. Can’t wait to try it with other nuts next!
wpx_
Awesome to hear you and your kids enjoyed it! Chocolate peanut butter sounds delicious! Keep experimenting with different nuts and flavors!
Finn Ryder
I just tried making almond butter using this guide and it was a game changer! I never knew it could be so easy. I used my Vitamix and it turned out super creamy, just like the store-bought stuff. Pro tip: I let the almonds roast a bit before blending for extra flavor. Definitely gonna make this again!