In this step-by-step guide, “How to Make Nut Butter in a Ninja Professional Blender,” we will explore the simple and rewarding process of crafting your own nut butter at home. The Ninja Professional Blender, renowned for its robust performance and versatility, makes it easy to blend your favorite nuts into a creamy, delicious spread. Whether you prefer almond, peanut, or a mixed nut butter, this guide will walk you through each stage, ensuring you achieve the perfect consistency and flavor while enjoying the health benefits of homemade nut butters. Let’s get started on your nut butter-making journey!


![Ninja Professional Chopper [NJ1002UKBK] Stackable, 200W, Black](https://m.media-amazon.com/images/I/71KOmn9ujSL._SS520_.jpg)
1. Gather Your Ingredients and Equipment
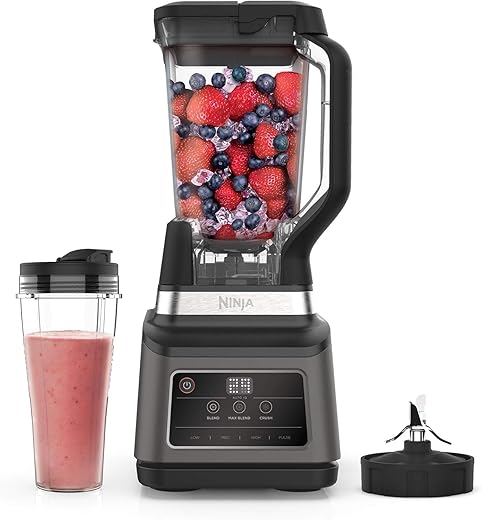
Gather your raw nuts, choosing from almonds, peanuts, or cashews based on your preference. Measure out the desired amount—typically around two cups is a good start for a small batch of nut butter. Ensure that your nuts are fresh and free from any added oils or salts for the best flavor and texture. Place these nuts in a bowl nearby for easy access. Next, set up your Ninja Professional Blender, ensuring it is clean and dry. This powerful blender will make the process smooth and efficient, transforming your raw nuts into a creamy butter.
Grab your spatula, as you’ll need it to scrape down the sides of the blender during the blending process. This ensures an even consistency and prevents any clumping. Once you’ve gathered everything, find an airtight container for storage after making your nut butter. A glass jar or a sturdy plastic container with a tight seal works well, keeping your nut butter fresh for longer periods. With your ingredients and equipment ready, you’re all set to create a delicious homemade treat!
2. Prepare the Nuts
Measure out about 2 cups of your chosen nuts, such as almonds, walnuts, or cashews. This quantity is just right for creating a delicious nut butter or adding a crunch to your recipes. If you prefer, roast the nuts in the oven at 350°F for 10-15 minutes. Spread the nuts evenly on a baking sheet and keep an eye on them, stirring occasionally. Roasting brings out the natural oils and intensifies the flavor, so don’t skip this step if you’re looking for a richer taste.
Allow the nuts to cool completely before blending them. If you don’t wait, the heat can affect the consistency of your nut butter or any other dish you’re preparing. Once cooled, transfer the nuts into a blender or food processor. Blend until smooth, stopping to scrape down the sides if necessary. Enjoy the delightful aroma and prepare for a nutty experience that elevates your culinary projects!
3. Add Nuts to the Blender
Place the cooled nuts into the pitcher of the Ninja Professional Blender. Make sure the nuts are completely cooled, as hot nuts can release oil and lead to a mess in your blender. Fill the pitcher with your desired amount of nuts, but be careful not to overcrowd it. Leave some space at the top to allow for blending without any spillage. Spread the nuts out evenly to ensure they blend smoothly and uniformly.
Secure the lid tightly on the blender pitcher before you start blending. Double-check that the lid is locked into place to prevent any splatter during the blending process. Select your blending speed, starting low and gradually increasing to achieve the desired consistency. Blend until the nuts reach a fine powder or to your preferred texture. Keep an eye on the mixture to avoid over-processing, as nuts can quickly turn into nut butter if blended too long.
4. Blend the Nuts
Start blending the nuts on a low setting. This gentle approach helps to break down the nuts without splattering. Gradually increase the speed to high as the nuts begin to break apart. Observe how the texture transforms from coarse pieces to a finer meal. If you’re using harder nuts like almonds or walnuts, this process might take a few minutes. During the blending, pause every so often to scrape down the sides of the blender with a spatula. This ensures that all the nuts are thoroughly blended and no chunks are stuck to the sides.
Continue blending until the mixture reaches a creamy consistency. This could take anywhere from three to ten minutes, depending on the type of nuts and the power of your blender. Take a moment to stop and check the texture every couple of minutes. If you notice it still feels gritty, keep blending. For instance, if you’re making almond butter, aim for a smooth, pourable result that you can spread easily. Don’t hesitate to take breaks to scrape down the sides and keep everything uniformly mixed. This step is crucial to achieving that luscious creamy texture we all love!
5. Store the Nut Butter
Transfer the nut butter into an airtight container with a rubber spatula. Make sure to scrape the bowl thoroughly to gather every delicious bit. Choose a container that is appropriately sized—too large may allow for air exposure, while too small might make it difficult to access the nut butter later. Seal the container tightly after transferring the nut butter to prevent any moisture or air from getting in, which can spoil its freshness. If you have made a large batch, consider portioning it into smaller containers for easier access and longer shelf life.
Store the airtight container in the refrigerator for optimal preservation. Maintaining a cool environment will help extend the nut butter’s freshness for several weeks. Keep in mind that natural nut butters may separate over time, so when you’re ready to use it again, give it a good stir to reincorporate any separated oils. Label the container with the date it was made, so you can keep track of its freshness. Enjoy the creamy, delightful goodness of your nut butter while ensuring it stays fresh and tasty!
Enjoy Your Homemade Creation
In conclusion, making nut butter in a Ninja Professional Blender is not only easy but also a fun way to enhance your kitchen skills. With just a few simple steps, you can craft a creamy, nutritious spread tailored to your taste. Whether you choose to incorporate it into your favorite recipes or savor it straight from the jar, your homemade nut butter will surely delight you and contribute to a healthier lifestyle. So, why not give it a try? Embrace your culinary creativity and enjoy all the delicious possibilities that homemade nut butter offers!
Essential Equipment List
- Nuts (e.g., almonds, peanuts, cashews, etc.)
- Ninja Professional Blender
- Measuring cup
- Spatula
- Airtight container (for storage)

Blending Made Easy
- Choose the Right Nuts: Start with raw or roasted nuts like almonds, cashews, or peanuts. Avoid nuts that are overly salted or sweetened
- Measure Your Nuts: Use about 2 cups of nuts for a standard batch. This amount works well for optimal blending
- Add a Pinch of Salt: Including a little salt enhances the nutty flavor and balances the sweetness
- Consider Oil: If you prefer a creamier texture, add a tablespoon of neutral oil (like grapeseed or coconut oil) to help the blending process
- Pre-Soak Nuts (Optional): For a smoother nut butter, soak raw nuts in water for 4-6 hours, then drain and pat dry before blending
- Start Slow: Begin blending on a low speed to break down the nuts evenly, then gradually increase the speed as they mash together
- Scrape Down Sides: Pause to scrape the sides of the pitcher every 30 seconds to ensure all the nuts are blended evenly
- Be Patient: It may take several minutes for the nuts to turn into butter. Keep blending until you achieve your desired consistency
- Store Properly: Transfer your nut butter to an airtight container and store in the refrigerator for up to a month for the freshest taste
- Experiment with Flavors: After mastering the basic nut butter, try adding vanilla extract, cocoa powder, or honey to create unique flavor profiles
Mastering Your Ninja Professional Blender: Essential Tips for Optimal Use
- Read the Manual: Before you dive in, it’s always good to familiarize yourself with the user manual. This will give you insights into the specific features and functions of your model
- Assemble the Blender: Make sure you properly assemble the blending pitcher, blades, and lid. Ensure everything is securely fitted to avoid spills during blending
- Add Ingredients: Start with the liquids first, followed by softer ingredients, and then add harder items on top. This layering technique helps the blender work more efficiently
- Choose the Right Settings: Experiment with the different speed settings and preset programs (if available) for smoothies, ice crushing, or food processing. Start on a lower speed and gradually increase to avoid overloading the blender
- Clean After Use: After blending, rinse the pitcher and blades immediately to make cleaning easier. Most parts are dishwasher safe, but I like to hand wash to keep them in top condition
- Feel free to ask if you have any other questions about using your Ninja blender—I’m here to help!
Everything You Need to Know About Your Ninja Blender
Is there a pulse function on the Ninja Professional Blender?
Yes, the Ninja Professional Blender does come with a pulse function. This feature allows you to achieve precise blending control by pulsing the blades for short bursts, which can be particularly useful for tasks like chopping ingredients or creating chunkier textures. It’s a great option if you’re looking to have more control over your blending process!
How does the Ninja Professional Blender compare to other blenders in its price range?
The Ninja Professional Blender stands out in its price range for several reasons. Firstly, it typically has a powerful motor, often around 1,000 watts, which allows it to blend tough ingredients and ice with ease, making it ideal for smoothies, soups, and frozen drinks. In comparison to other blenders in a similar price bracket, this level of power is quite competitive.
Another key feature is its large capacity. The Ninja Professional usually comes with a sizable pitcher, often around 72 ounces, which is great for blending larger batches at once. This is something that many blenders in this range don’t offer, as they often have smaller containers.
When it comes to versatility, the Ninja tends to include various blending settings and features, such as pulse and pre-programmed functions, which allow for greater control over the blending process. Brands like Oster or Hamilton Beach may offer similar features, but they often lack the same overall performance, particularly in terms of ice-crushing capability.
Lastly, the design and build quality of the Ninja Professional Blender typically receive positive reviews. Its sturdiness is often compared favorably to budget models from other brands, which might feel less durable.
Overall, while there are many blenders in this price range, the Ninja Professional Blender combines power, capacity, and versatility in a way that often makes it a preferred choice for both casual users and culinary enthusiasts alike.


11 comments
Captain Joy
It would be awesome if you could do a follow-up article on different nut butter recipes or maybe even savory nut butter options! That could really spice things up!
wpx_
Great idea! I’ll definitely consider that for future articles. There are so many ways to play with flavors and textures in nut butter—thanks for the suggestion!
Star
I followed the steps, but my nut butter ended up kind of grainy. Is there a way to make it smoother? I used a Ninja Professional Blender as suggested, but it just didn’t get there.
wpx_
Sorry to hear that! If your nut butter is grainy, try blending a bit longer or adding a small amount of oil (like coconut or peanut oil) to help it smooth out. Don’t forget to scrape down the sides too!
Peanut
Has anyone tried adding flavors to their nut butter, like cocoa powder or vanilla extract? I’m curious about how that might change the taste!
Jolly Roger
I just made almond butter using this guide, and it turned out AMAZING! My kids are obsessed with it. I never thought making nut butter could be so easy! Thanks for the clear steps!
Happy Feet
I’ve been thinking about trying other nuts, like cashews or hazelnuts. Do you think the process would be the same? Anyone have experience with that?
wpx_
Absolutely! The process is pretty similar for other nuts, but just keep an eye on the consistency as some nuts may blend faster than others. Cashews, for example, can get creamy quicker!
Ace
This guide was super helpful! I’ve always wanted to make my own nut butter, but I was intimidated. Any tips on how to clean the blender afterward? It gets pretty sticky!
wpx_
Cleaning the blender can be tricky! I usually fill it with warm soapy water and let it run for a minute, then rinse it out. It helps break down the sticky residue!
Bubbles
Are there any advanced tips for making nut butter? Like, how can I make it more nutritious or add protein without compromising the taste?