
In this step-by-step guide, “How to Set Up Your Versatile Food Processor for Perfect Results,” we understand that navigating new kitchen appliances can be a bit daunting. This guide is designed with empathy to help you feel confident and empowered as you embrace your food processor. We’ll walk you through each essential setup step, including selecting the right attachments, assembling the unit, and understanding the various functions. By following these easy instructions, you’ll not only streamline your meal prep but also unleash your creativity in the kitchen, ensuring delicious and consistent results with every use.


1. Gather Your Components
Gather all the components of your food processor before diving into your culinary adventure. Start by collecting the following essentials:
- Base Unit: This is the heavy part that houses the motor. Ensure it’s plugged in and ready to go.
- Bowl: This is where all the slicing, chopping, and mixing magic happens. Attach it securely to the base.
- Lid: Place the lid on the bowl properly to avoid any splatters during operation.
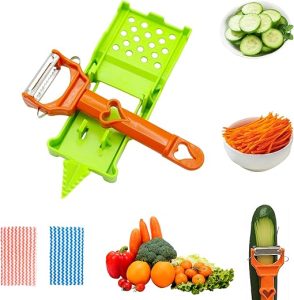
- Attachments: Locate your various blades and disks, such as the slicing blade, shredding disk, and chopping blade. Keep them handy, as you’ll need them for different tasks.
Ensure you have a clean, dry workspace to set everything up. A clutter-free area will help you move around easily and focus on your food preparation. If you’re working with multiple ingredients, consider organizing them nearby for quick access. For example, if you’re chopping vegetables, have all your carrots, onions, and peppers washed and ready to go. Setting a comfortable workflow in your kitchen truly enhances your cooking experience!
2. Assemble the Food Processor
Attach the bowl to the base unit, ensuring it locks into place securely. Rotate the bowl clockwise until you hear a clicking sound, indicating it is properly secured. Insert the appropriate blade or disk for the task at hand. If using a blade, press it down onto the central spindle until it is snug. If using a disk, align it with the attachment hub and twist it into place.
Place the lid onto the bowl, making sure it clicks into position. Gently press down on the lid until you hear the lock engage. Verify that the lid is securely in place before proceeding with your food preparation tasks. Check the components to confirm everything is properly assembled and ready for use.
3. Prepare Your Ingredients
Wash all your ingredients thoroughly under running water. This step is crucial to remove any dirt, pesticides, or debris that may be lingering on the surface. Pay special attention to leafy greens and produce with crevices, as they might trap more dirt.
Peel fruits and vegetables as necessary, especially if their skins are tough or not palatable. Common items to peel include carrots, potatoes, and apples. After washing and peeling, chop your ingredients into smaller, evenly-sized pieces. Aim for sizes that are around one to two inches. This not only helps your food processor operate more effectively but also ensures that everything blends together seamlessly, giving you a consistently smooth or finely chopped result.
- Wash ingredients under cool running water.
- Peel tough-skinned fruits and vegetables.
- Chop into one to two-inch pieces.
- Ensure uniform sizes for even processing.
4. Set the Correct Speed and Function
Select the appropriate speed and function based on what you are preparing. Each food processor comes with various settings tailored for specific tasks like chopping, mixing, pureeing, and slicing. Familiarize yourself with these options, as each setting is designed to achieve optimal results for different food textures and consistencies. For example, use a lower speed for gentle tasks like folding in ingredients, and a higher speed for more vigorous mixing or blending.
Refer to the user manual for guidance on which speed works best for your specific task. The manual typically provides detailed instructions and recommendations that will help you avoid over-processing or under-processing your ingredients. If you’re unsure, start with the recommended setting and adjust as necessary to reach your desired outcome, keeping an eye on the consistency as you go.
5. Monitor the Processing
- Monitor the consistency of your ingredients as they process. Adjust processing time to achieve the texture you desire.
- Stop the machine every few minutes. Use a spatula to scrape down the sides of the bowl. This prevents uneven mixing and ensures all ingredients blend properly.
- Check for lumps or inconsistencies after each scrape. If necessary, continue processing until you reach the desired smoothness.
- Remember, the key to a great result is continuous attention. Make sure to keep an eye on how the texture develops throughout the process.
6. Clean and Store Your Food Processor
Disassemble the food processor after each use. Remove the bowl, blade, and any attachments carefully, ensuring you handle sharp parts with care. Wash each component according to the manufacturer’s instructions. If the parts are dishwasher safe, place them on the top rack of the dishwasher for a thorough clean. If washing by hand, use warm, soapy water and a non-abrasive sponge to avoid scratches. Rinse thoroughly and dry each piece completely before reassembling.
Store the food processor in a dry place to prevent moisture buildup. Avoid stacking heavy items on top of it to keep it in good shape. If space allows, keep all components together, so they’re easy to access for your next cooking adventure. By following these simple steps, you’ll ensure your food processor is clean, safe, and ready for use whenever inspiration strikes!
Final Tips for Success
In conclusion, setting up your versatile food processor is a straightforward process that can elevate your cooking game. By properly assembling your machine, preparing your ingredients thoughtfully, and maintaining a clean workspace, you’ll be well on your way to achieving perfect results every time. Not only will you enjoy delicious meals, but you’ll also prolong the life of your appliance. Happy cooking!
Essential Gear List
- Versatile food processor
- Power outlet
- Bowl or container for processed food
- Cutting board
- Knife
- Measuring cups and spoons
- Scraper or spatula
- Ingredients (fruits, vegetables, nuts, etc.)
- User manual for the food processor
- Cleaning supplies (dish soap, sponge, towel)

Essential Setup Insights
- Read the Manual: Before getting started, I always recommend reading the user manual. It contains crucial information about the attachments and settings specific to your food processor
- Choose the Right Attachment: Make sure to select the appropriate blade or disc for the task at hand, whether it’s chopping, slicing, or shredding. This can greatly impact the outcome
- Prep Ingredients: I find that cutting ingredients into uniform sizes helps them process evenly. For example, chop larger vegetables into quarters before adding them to the bowl
- Don’t Overfill: Be mindful of your food processor’s capacity. Overpacking can lead to uneven results, so it’s best to process in batches if needed
- Use Pulse Mode: When chopping or mixing, I often use the pulse function to maintain better control over the texture and prevent overprocessing
- Add Liquid Gradually: If I’m blending or pureeing, I typically add liquids slowly through the feed tube. This helps achieve the desired consistency without making it too runny
- Scrape Down the Sides: Halfway through processing, I like to stop and scrape down the sides of the bowl to ensure everything is evenly mixed
- Warm Up the Motor: If I’m processing heavy or tough ingredients, I avoid running the motor for too long continuously; instead, I give it short bursts to prevent overheating
- Clean Immediately: I find it easier to clean the bowl and attachments right after use while the food residue is still fresh. This helps prevent sticking and makes cleanup a breeze
- Experiment and Adjust: I always keep in mind that recipes may require tweaking based on my food processor’s brand and model. Don’t be afraid to adjust processing times and techniques for perfect results!
Maximize Your Culinary Creativity: Tips and Techniques for Using Versatile Food Processors
- Chopping and Slicing: Start by using the slicing and chopping attachments to prep vegetables for salads, stir-fries, or soups. It’s a quick way to get even cuts without the hassle of knife work
- Mixing Dough: If you’re into baking, try using your food processor to mix dough for cookies, bread, or pastry. Simply add your dry ingredients, followed by wet ingredients, and let the processor do the kneading for you!
- Making Purees and Sauces: You can create smooth purees for soups or ingredients for sauces. Just add cooked vegetables or fruits and blend until smooth. It’s great for making homemade baby food too!
- Grating Cheese and Vegetables: Use the grating attachment to quickly grate cheese for pizzas or pasta dishes, or to shred vegetables for coleslaw and other recipes, saving time and effort
- Grinding Nuts and Seeds: Transform whole nuts or seeds into a coarse meal or butter. Just pulse them in the food processor until you reach your desired texture—perfect for homemade nut butters or granola!
- Jump in and have fun experimenting with your food processor! You’ll soon discover all its awesome capabilities
Your Essential Questions about Versatile Food Processors
Are there any specific recipes that highlight the versatility of food processors?
Absolutely! Food processors are incredibly versatile kitchen appliances that can help you with a wide range of recipes. Here are a few specific recipes that really showcase their capabilities:
- Vegetable Puree: You can use a food processor to make silky smooth vegetable purees, such as roasted carrot or butternut squash puree. Simply roast the veggies, then blend them with a little broth or water until smooth.
- Homemade Hummus: One of the classic recipes, making hummus in a food processor is a breeze. Combine canned chickpeas, tahini, garlic, lemon juice, and olive oil, and blend until creamy. You can customize it with additional flavors like roasted red peppers or spices.
- Nut Butters: Creating your own nut butter, such as peanut or almond butter, is easy with a food processor. Just blend roasted nuts until they reach the desired consistency, adding a bit of salt or honey for extra flavor.
- Doughs for Baking: Food processors excel at making doughs. For instance, you can whip up a quick pie crust or pizza dough by pulsing flour, butter, and water together until it forms a dough.
- Pesto: Making pesto is another great use of a food processor. Just combine fresh basil, garlic, pine nuts, Parmesan cheese, and olive oil, then process until smooth. It’s a quick way to make a flavorful sauce for pasta or a spread for sandwiches.
- Shredded Cheese: If you want freshly shredded cheese for a recipe, you can use a food processor. Just cut the cheese into chunks and pulse it until it reaches your preferred texture—much quicker than grating by hand!
These recipes are just a few examples of how a food processor can simplify the cooking process and enhance your kitchen creativity. Whether you’re prepping ingredients, pureeing soups, or creating salsas, this tool makes it all so much easier and faster!


18 comments
Fable
Just got a Cuisinart DFP-14BCNY and I followed this guide step-by-step. I was amazed at how quickly I whipped up some hummus! The key was definitely setting the right speed. Thanks for making this easy! Can’t wait to try chopping veggies next! 🥕🌿
Pixie
Can anyone help me? I was trying to make pesto and my processor kept stalling. I followed all the steps, but it just wouldn’t blend! 😩
wpx_
Sounds frustrating! Make sure you’re not overloading the bowl. Try adding more oil gradually and scrape down the sides. It should help with the blending!
Quill
How about a section on making dough? I’ve heard food processors can do that too, but I’m not sure how it works. Would be cool to learn!
wpx_
Great suggestion! Dough-making is a fantastic use for food processors. We’ll consider adding that to our future topics!
Scout
Would love to see more on cleaning tips! I find the nooks and crannies are tough to get to after making something sticky. Any advice?
wpx_
Cleaning can be a hassle! Try soaking the parts in warm soapy water right after use. A toothbrush can help get into those hard-to-reach spots!
Raven Hart
I did everything by the book and made the best guacamole ever! Everyone was raving about it at the party. Thanks for the awesome guidance! 🥑🎉
wpx_
Yay, that’s fantastic to hear! Guacamole is always a crowd-pleaser. Thanks for sharing your success story!
Rocco
I just tried this with my Ninja BN701 Professional Plus Bender and it worked like a charm for making nut butter! Following the speed and monitoring really did the trick. This guide is solid!
wpx_
So glad to hear that! Nut butter is a delicious use for food processors. Keep experimenting with different nuts and flavors!
Remy
I’m curious, is it better to prep ingredients before assembling the processor, or can I do it afterward? I usually do it all at once but sometimes it feels chaotic.
wpx_
Great question! Prepping first gives you a smoother workflow and reduces mess. Try it out next time and see if you like it better!
Nova
Thanks for sharing your experience! The Cuisinart is a great choice, and hummus is always a hit. Let us know how the veggies turn out!
Crew Chief
I always struggle with the speed settings! Sometimes I end up with mush instead of nice chunks. Does anyone have tips for getting that perfect chop? 🤔
wpx_
A common issue! Try starting at a lower speed and then gradually increasing it. This way, you have more control over the texture. Happy processing!
River Stone
I love my KitchenAid 13-Cup Food Processor, but I find that using the slicing blade for cheese doesn’t always work well. Anyone else have this issue? What do you do? 🧀
wpx_
Cheese can be tricky! Try chilling it first; it should slice much better. Alternatively, you can use a box grater for softer cheeses. Good luck!